CentOS 7 に Ghost (CMS) ブログ公開プラットフォームをインストールする方法
Ghost は、無料のオープンソースで、Nodejs で書かれたシンプルかつ強力なブログまたはオンライン出版ソフトウェアです。これは、オンライン出版物を簡単に構築および実行できるように設計された最新の出版ツールのコレクションです。
ゴーストの特徴:
- 高速、スケーラブル、効率的。
- マークダウンベースの編集環境を提供します。
- デスクトップアプリが付属しています。
- 美しいハンドルバーテンプレートが付属しています。
- シンプルなコンテンツ管理をサポートします。
- 著者、編集者、管理者の複数の役割をサポートします。
- コンテンツを事前にスケジュール設定できます。
- 高速化されたモバイル ページをサポートします。
- 検索エンジンの最適化を完全にサポートします。
- 詳細な構造化データを提供します。
- RSS、電子メール、Slack による購読をサポートします。
- 簡単なサイト編集などが可能になります。
要件:
- 1GB メモリを搭載した CentOS 7 サーバーの最小インストール
- 静的 IP アドレスを持つ CentOS 7 システム
- Node v6 LTS – 最新の Node.js と NPM を CentOS 7 にインストールする
- Nginx がインストールされた CentOS 7 サーバー
重要: Ghost のインストールを自分で開始する前に、優れた VPS ホスティングが必要です。BlueHost を強くお勧めします。
この記事では、オープン ソースのゴースト (コンテンツ管理システム) ブログ プラットフォームを CentOS 7 システムにインストールする方法を説明します。
ステップ 1: CentOS 7 に Nodejs をインストールする
1. Nodejs は CentOS のソフトウェア リポジトリでは利用できないため、まずリポジトリを追加してから、次のようにインストールします。
curl --silent --location https://rpm.nodesource.com/setup_6.x | bash -
yum -y install nodejs npm
dnf -y install nodejs npm   [On Fedora 22+ versions]
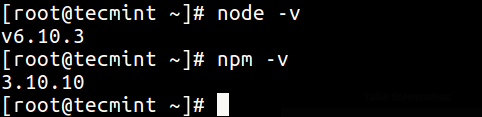
2. nodejs をインストールしたら、コマンドを使用して、推奨バージョンの Nodejs と npm がインストールされていることを確認できます。
node -v
npm -v
ステップ 2: CentOs 7 に Ghost をインストールする
3. 次に、アプリケーション ファイルを /var/www/ghost に保存する Ghost ルート ディレクトリを作成します。これは、推奨されるインストール場所です。
mkdir -p /var/www/ghost
4. 次に、Ghost の GitHub リポジトリから Ghost の最新バージョンをダウンロードし、上で作成したディレクトリにアーカイブ ファイルを解凍します。
curl -L https://ghost.org/zip/ghost-latest.zip -o ghost.zip
unzip -uo ghost.zip -d  /var/www/ghost
5. 次に、新しい Ghost ディレクトリに移動し、次のコマンドを使用して Ghost をインストールします (運用依存関係のみ)。 2 番目のコマンドが完了すると、Ghost がシステムにインストールされます。
cd /var/www/ghost
npm install --production
ステップ 3: デフォルトの Ghost ブログを開始してアクセスする
6. Ghost を起動するには、/var/www/ghost ディレクトリから次のコマンドを実行します。
npm start --production

7. デフォルトでは、Ghost はポート 2368 で実行されているはずなので、ファイアウォールでポートを開いてアクセスを許可します。
firewall-cmd --zone=public --permanent --add-port=2368/tcp
firewall-cmd --reload
8. 次に、Web ブラウザを開いて、以下の URL のいずれかに移動します。
http://SERVER_IP:2368
OR
http://localhost:2368
注: Ghost を初めて実行すると、ファイル config.js が Ghost のルート ディレクトリに作成されます。これを使用して、ゴーストの環境レベルの構成を設定できます。ここでは、サイトの URL、データベース、メール設定などのオプションを構成できます。
ステップ 4: Ghost 用に Nginx をインストールして構成する
図のように EPEL リポジトリを使用してインストールされていない場合は、Nginx Web サーバーをインストールして起動します。
yum install epel-release
yum install nginx
systemctl start nginx
ファイアウォールを実行している場合は、次のコマンドを使用して HTTP および HTTPS トラフィックへのアクセスを有効にします。
firewall-cmd --permanent --zone=public --add-service=http
firewall-cmd --permanent --zone=public --add-service=https
firewall-cmd --reload
次のステップは、Ghost ブログをポート 80 でサーバーするように Nginx を構成し、ユーザーが URL の末尾にポート :2368 を追加しなくても Ghost ブログにアクセスできるようにすることです。
まず、ターミナルで CTRL+C キーを押して、実行中の Ghost インスタンスを停止します。
次に、/etc/nginx/sites-available/ghost に新しいファイルを作成して Nginx を構成します。
vi /etc/nginx/sites-available/ghost
次の設定を追加し、次の強調表示された行を必ずyour_domain_or_ip_address に変更してください。
server {
    listen 80;
    server_name your_domain_or_ip_address;
    location / {
    proxy_set_header HOST $host;
    proxy_set_header X-Forwarded-Proto $scheme;
    proxy_set_header X-Real-IP $remote_addr;
    proxy_set_header X-Forwarded-For $proxy_add_x_forwarded_for;
        proxy_pass         http://127.0.0.1:2368;
    }
}
ファイルを保存し、/etc/nginx/sites-enabled ディレクトリにシンボリックリンクを作成してこの設定をアクティブにします。
ln -s /etc/nginx/sites-available/ghost /etc/nginx/sites-enabled/ghost
次に、/etc/nginx.conf ファイルを開きます。 site-enabled ディレクトリに設定ファイルを含め、図のようにデフォルト サイトを無効にします。
vi /etc/nginx/nginx.conf
次に、http ブロック内に次の行を追加して、sites-enabled ディレクトリに構成ファイルを含めます。
http {
...
    # Load modular configuration files from the /etc/nginx/conf.d directory.
    # See http://nginx.org/en/docs/ngx_core_module.html#include
    # for more information.
    include /etc/nginx/conf.d/*.conf;
    include /etc/nginx/sites-enabled/*;
次に、http ブロック内にあるデフォルトのサーバー ブロックを完全にコメントアウトします。
...

    # Load modular configuration files from the /etc/nginx/conf.d directory.
    # See http://nginx.org/en/docs/ngx_core_module.html#include
    # for more information.
    include /etc/nginx/conf.d/*.conf;
    include /etc/nginx/sites-enabled/*;


   server {
      listen       80 default_server;
      listen       [::]:80 default_server;
      server_name  _;
      root         /usr/share/nginx/html;
#
      # Load configuration files for the default server block.
      include /etc/nginx/default.d/*.conf;
#
      location / {
      }
#
      error_page 404 /404.html;
          location = /40x.html {
      }
#
      error_page 500 502 503 504 /50x.html;
          location = /50x.html {
      }
...
...
最後に、nginx Web サーバーを保存して再起動します。
systemctl restart nginx
もう一度、http://your_domain_or_ip_address にアクセスすると、Ghost ブログが表示されます。
詳細については、Ghost ホームページを参照してください: https://ghost.org/
この記事では、CentOS 7 に Ghost をインストールして構成する方法を説明しました。ガイドに関するご質問やご意見は、以下のコメント フォームを使用してお送りください。
最後になりましたが、次回の投稿では、Debian と Ubuntu で Ghost をセットアップする方法を説明します。それまでは、linux-console.net に接続したままにしてください。