Debian 11 に Nginx で osTicket をインストールする方法
このページでは
- 前提条件
- はじめに
- Nginx と PHP をインストールする
- MariaDB のインストールと構成
- osTicket をインストールする
- osTicket 用に Nginx を構成する
- osTicket ウェブ インターフェースへのアクセス
- osTicket で SSL を有効にする
- 結論
osTicket は、カスタマー サービスを拡張および合理化し、カスタマー エクスペリエンスを向上させるために使用される無料のオープンソース サポート チケット システムです。すべてのサポート チケットを管理、整理、および追跡するための Web ベースのインターフェイスを提供します。 PHP で書かれており、MySQL や PostgreSQL などのさまざまなデータベースをサポートしています。
特徴
- ダッシュボード レポート
- 設定可能なヘルプ トピック
- サービス レベル アグリーメント
- チケット フィルター
- カスタマー サポート ポータル
- オートレスポンダー
このチュートリアルでは、Debian 11 に osTicket をインストールする方法を示します。
前提条件
- Debian 11 を実行するサーバー。
- 有効なドメイン名がサーバー IP で示されている。
- サーバー上で root パスワードが構成されている。
入門
まず、次のコマンドを使用して、すべてのシステム パッケージを最新バージョンに更新およびアップグレードします。
apt update -y
apt upgrade -y
すべてのパッケージが更新されたら、次のコマンドを使用して他の必要なパッケージをインストールできます。
apt install ca-certificates apt-transport-https software-properties-common wget curl
必要なパッケージがすべてインストールされたら、次のステップに進むことができます。
Nginx と PHP をインストールする
まず、次のコマンドを使用して Nginx Web サーバー パッケージをインストールします。
apt install nginx -y
次に、次のコマンドを使用して PHP リポジトリを追加します。
curl -sSL https://packages.sury.org/php/README.txt | bash -x
次に、次のコマンドを使用して、PHP の最新バージョンとその他の必要な PHP 依存関係をインストールします。
apt install php8.1 php8.1-mysql php8.1-cgi php8.1-fpm php8.1-cli php8.1-curl php8.1-gd php8.1-imap php8.1-mbstring php8.1-intl php8.1-apcu php8.1-common php8.1-gettext php8.1-bcmath php8.1-xml php8.1-dom -y
インストール後、PHP 構成ファイルを編集します。
nano /etc/php/8.1/fpm/php.ini
次の行を変更します。
cgi.fix_pathinfo=0
ファイルを保存して閉じ、PHP-FPM サービスを再起動して変更を適用します。
systemctl restart php8.1-fpm
MariaDB のインストールと構成
まず、次のコマンドを使用して MariaDB データベース サーバーをインストールします。
apt install mariadb-server -y
次に、次のコマンドを使用して MariaDB インストールを保護します。
mysql_secure_installation
以下のすべての質問に答えてください。
Set root password? [Y/n] Y
New password:
Re-enter new password:
Remove anonymous users? [Y/n] Y
Disallow root login remotely? [Y/n] Y
Remove test database and access to it? [Y/n] Y
Reload privilege tables now? [Y/n] Y
次に、root ユーザーとして MariaDB シェルにログインします。
mysql -u root -p
次に、osTicket 用のデータベースとユーザーを作成します。
MariaDB [(none)]> create database osticketdb;
MariaDB [(none)]> grant all privileges on osticketdb.* to osticketuser identified by 'secure-password';
次に、特権をフラッシュし、次のコマンドで MariaDB シェルを終了します。
MariaDB [(none)]> flush privileges;
MariaDB [(none)]> exit;
osTicketをインストールする
まず、GitHub のダウンロード ページから最新バージョンの osTicket をダウンロードします。
wget https://github.com/osTicket/osTicket/releases/download/v1.17.2/osTicket-v1.17.2.zip
ダウンロードが完了したら、osTicket 用のディレクトリを作成し、そのディレクトリ内にダウンロードしたファイルを抽出します。
mkdir /var/www/html/osticket
unzip osTicket-v1.17.2.zip -d /var/www/html/osticket
次に、osticket ディレクトリの所有権と権限を設定します。
chown -R www-data:www-data /var/www/html/osticket
chmod -R 755 /var/www/html/osticket
次に、osTicket サンプル構成ファイルの名前を変更します。
mv /var/www/html/osticket/upload/include/ost-sampleconfig.php /var/www/html/osticket/upload/include/ost-config.php
完了したら、次のステップに進むことができます。
osTicket 用に Nginx を構成する
次に、osTicket 用の Nginx 仮想ホスト構成ファイルを作成する必要があります。以下のコマンドで作成できます。
nano /etc/nginx/conf.d/osticket.conf
次の構成を追加します。
server {
listen 80;
server_name osticket.example.com;
root /var/www/html/osticket/upload;
index index.php index.html index.htm;
access_log /var/log/nginx/access.log;
error_log /var/log/nginx/error.log;


# Enable gzip
gzip on;
gzip_min_length 1000;
gzip_types text/plain application/x-javascript text/xml text/css application/xml;

set $path_info "";

location ~ /include {
deny all;
return 403;
}

if ($request_uri ~ "^/api(/[^\?]+)") {
set $path_info $1;
}

location ~ ^/api/(?:tickets|tasks).*$ {
try_files $uri $uri/ /api/http.php?$query_string;
}

if ($request_uri ~ "^/scp/.*\.php(/[^\?]+)") {
set $path_info $1;
}

location ~ ^/scp/ajax.php/.*$ {
try_files $uri $uri/ /scp/ajax.php?$query_string;
}

location / {
try_files $uri $uri/ index.php;
}

location ~ \.php$ {
fastcgi_param SCRIPT_FILENAME $document_root$fastcgi_script_name;
include fastcgi_params;
include snippets/fastcgi-php.conf;
fastcgi_pass unix:/run/php/php8.1-fpm.sock;
}
}
ファイルを保存して閉じ、次のコマンドで Nginx の構成を確認します。
nginx -t
次の出力が得られます。
nginx: the configuration file /etc/nginx/nginx.conf syntax is ok
nginx: configuration file /etc/nginx/nginx.conf test is successful
次に、Nginx サービスを再起動して変更を適用します。
systemctl restart nginx
次のコマンドを使用して Nginx のステータスを確認することもできます。
systemctl status nginx
次の出力に Nginx のステータスが表示されます。
? nginx.service - A high performance web server and a reverse proxy server
     Loaded: loaded (/lib/systemd/system/nginx.service; enabled; vendor preset: enabled)
     Active: active (running) since Wed 2022-12-21 08:15:10 UTC; 4s ago
       Docs: man:nginx(8)
    Process: 24700 ExecStartPre=/usr/sbin/nginx -t -q -g daemon on; master_process on; (code=exited, status=0/SUCCESS)
    Process: 24701 ExecStart=/usr/sbin/nginx -g daemon on; master_process on; (code=exited, status=0/SUCCESS)
   Main PID: 24702 (nginx)
      Tasks: 2 (limit: 2339)
     Memory: 3.1M
        CPU: 25ms
     CGroup: /system.slice/nginx.service
             ??24702 nginx: master process /usr/sbin/nginx -g daemon on; master_process on;
             ??24703 nginx: worker process

Dec 21 08:15:10 debian11 systemd[1]: nginx.service: Succeeded.
Dec 21 08:15:10 debian11 systemd[1]: Stopped A high performance web server and a reverse proxy server.
Dec 21 08:15:10 debian11 systemd[1]: Starting A high performance web server and a reverse proxy server...
Dec 21 08:15:10 debian11 systemd[1]: nginx.service: Failed to parse PID from file /run/nginx.pid: Invalid argument
Dec 21 08:15:10 debian11 systemd[1]: Started A high performance web server and a reverse proxy server.
この時点で、Nginx がインストールされ、osTicket 用に構成されています。これで、osTicket へのアクセスに進むことができます。
osTicket Web インターフェイスへのアクセス
Web ブラウザを開き、URL http://osticket.example.com を使用して osTicket インストール ページにアクセスします。前提条件ページが表示されます。
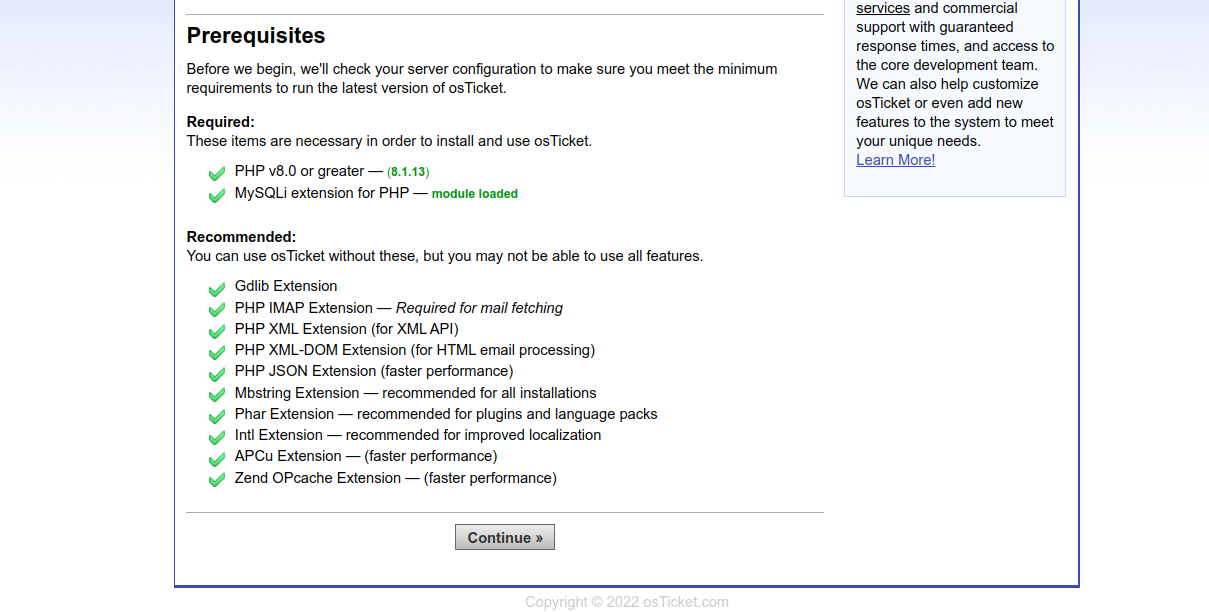
[続行] をクリックします。基本的なインストール ページが表示されます。

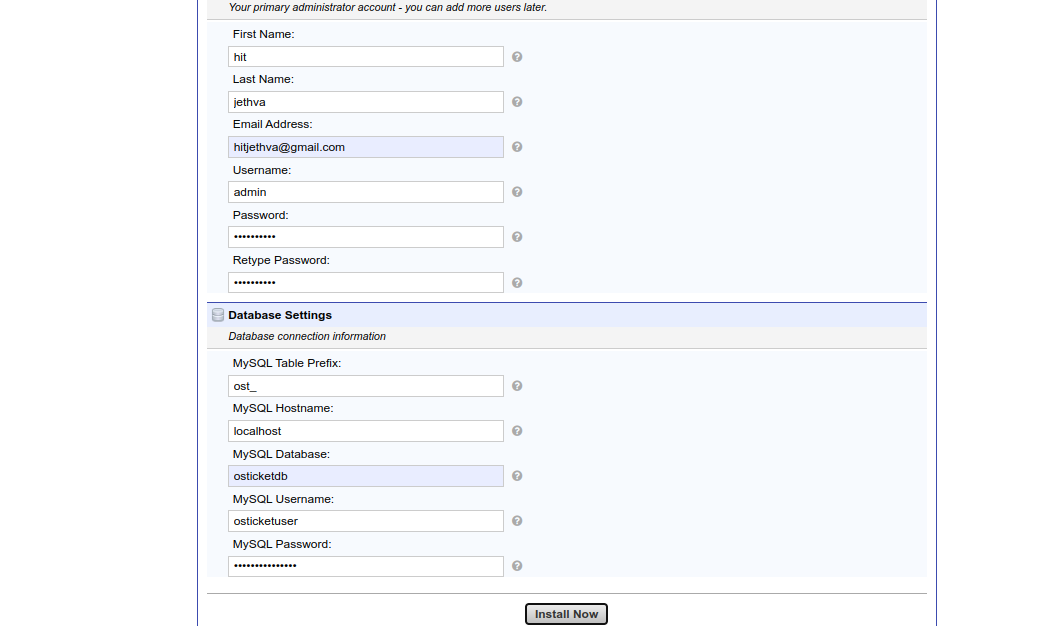
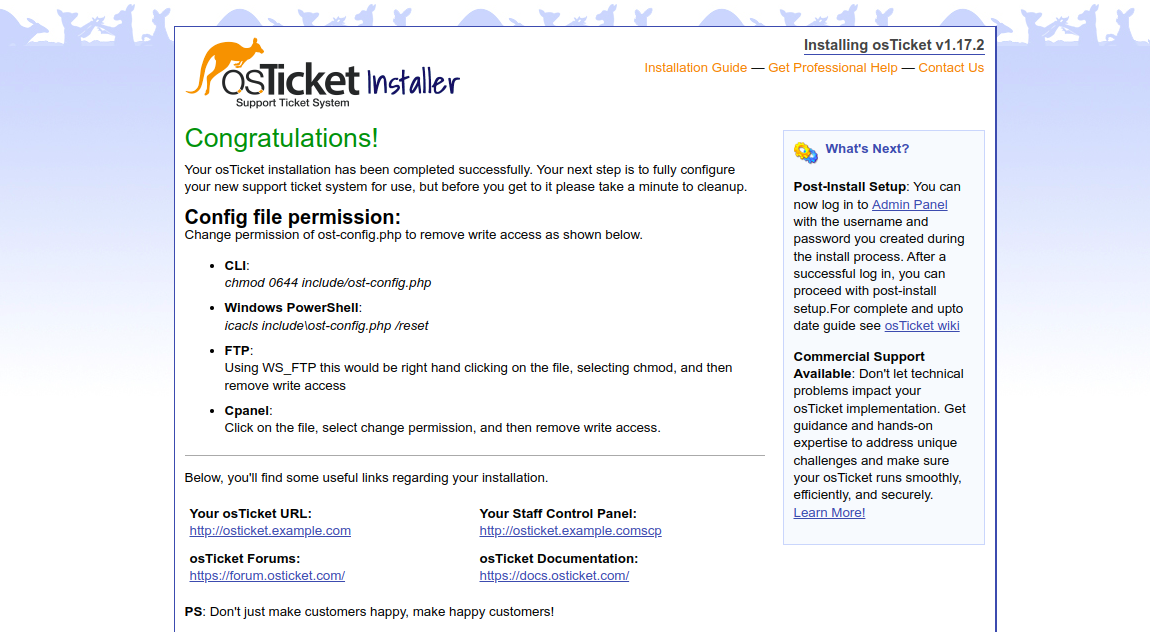
ヘルプデスクの URL、名前、電子メール、データベース名、ユーザー名、パスワードを定義し、[今すぐインストール] ボタンをクリックしてインストールを開始します。 osTicket がインストールされると、次のページが表示されます。
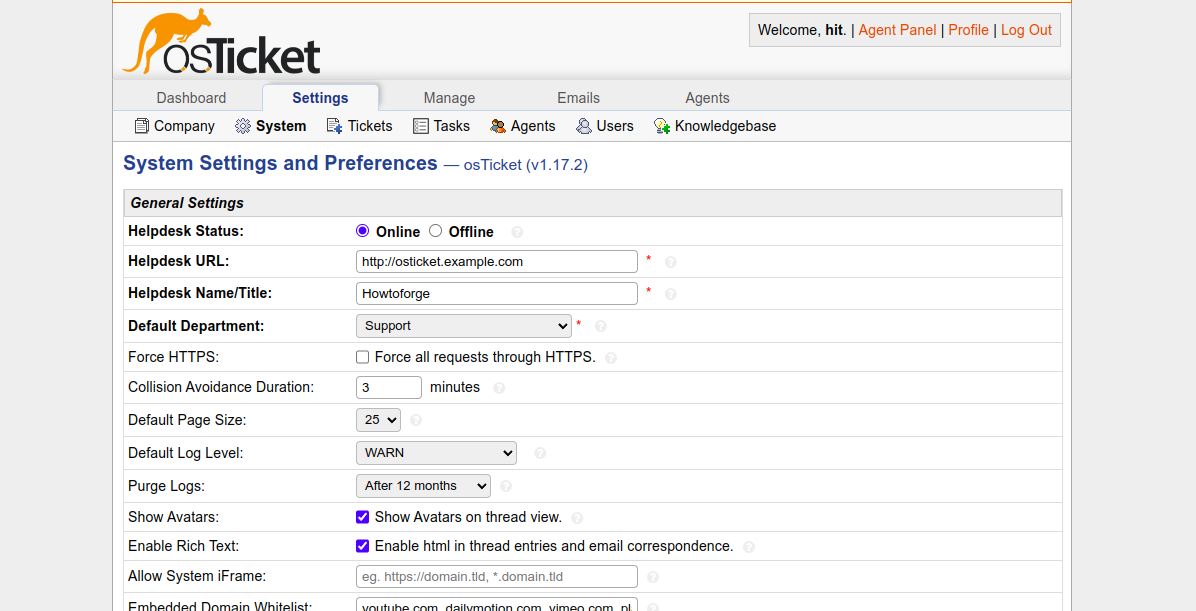
osTicket コントロール パネルにアクセスするには、Web ブラウザに URL http://osticket.example.com/scp を入力します。 osTicket ログイン ページが表示されます。

管理者のユーザー名とパスワードを入力し、[ログイン] ボタンをクリックします。次の画面に osTicket ダッシュボードが表示されます。
URL https://forum.osticket.com を使用して osTicket フォーラム ページにアクセスすることもできます。

osTicket で SSL を有効にする
Lets Encrypt SSL を osTicket Web サイトにインストールするには、サーバーに certbot パッケージをインストールする必要があります。
まず、次のコマンドを使用して Snap パッケージ マネージャーをインストールします。
apt install snapd
次に、Snap パッケージを最新バージョンに更新します。
snap install core
snap refresh core
次に、次のコマンドを使用して certbot パッケージをインストールします。
snap install --classic certbot
次に、システムの場所への Certbot バイナリのシンボリック リンクを作成します。
ln -s /snap/bin/certbot /usr/bin/certbot
次に、次のコマンドを実行して、Lets Encrypt SSL 証明書をダウンロードしてインストールします。
certbot --nginx -d osticket.example.com
メールアドレスを提供し、利用規約に同意するよう求められます。
Saving debug log to /var/log/letsencrypt/letsencrypt.log
Enter email address (used for urgent renewal and security notices)
 (Enter 'c' to cancel):

- - - - - - - - - - - - - - - - - - - - - - - - - - - - - - - - - - - - - - - -
Please read the Terms of Service at
https://letsencrypt.org/documents/LE-SA-v1.3-September-21-2022.pdf. You must
agree in order to register with the ACME server. Do you agree?
- - - - - - - - - - - - - - - - - - - - - - - - - - - - - - - - - - - - - - - -
(Y)es/(N)o: Y

- - - - - - - - - - - - - - - - - - - - - - - - - - - - - - - - - - - - - - - -
Would you be willing, once your first certificate is successfully issued, to
share your email address with the Electronic Frontier Foundation, a founding
partner of the Let's Encrypt project and the non-profit organization that
develops Certbot? We'd like to send you email about our work encrypting the web,
EFF news, campaigns, and ways to support digital freedom.
- - - - - - - - - - - - - - - - - - - - - - - - - - - - - - - - - - - - - - - -
(Y)es/(N)o: Y
Y と入力して Enter キーを押し、ドメインの SSL 証明書をダウンロードしてインストールします。
Account registered.
Requesting a certificate for osticket.example.com

Successfully received certificate.
Certificate is saved at: /etc/letsencrypt/live/osticket.example.com/fullchain.pem
Key is saved at:         /etc/letsencrypt/live/osticket.example.com/privkey.pem
This certificate expires on 2023-03-22.
These files will be updated when the certificate renews.
Certbot has set up a scheduled task to automatically renew this certificate in the background.

Deploying certificate
Successfully deployed certificate for osticket.example.com to /etc/nginx/conf.d/osticket.conf
Congratulations! You have successfully enabled HTTPS on https://osticket.example.com

- - - - - - - - - - - - - - - - - - - - - - - - - - - - - - - - - - - - - - - -
If you like Certbot, please consider supporting our work by:
 * Donating to ISRG / Let's Encrypt:   https://letsencrypt.org/donate
 * Donating to EFF:                    https://eff.org/donate-le
- - - - - - - - - - - - - - - - - - - - - - - - - - - - - - - - - - - - - - - -
結論
おめでとう! Debian 11 に Nginx を使用して osTicket を正常にインストールしました。osTicket を会社に実装し、ヘルプデスク管理システムとして使用できるようになりました。ご不明な点がございましたら、お気軽にお問い合わせください。