CentOS/RHEL 8/7 に PHP および MariaDB を使用して Lighttpd をインストールする方法
Lighttpd は、他の Web サーバーと比較してメモリ使用量が少なく、速度が重要な環境向けに設計された、安全、高速、柔軟でより最適化されたオープンソースの Web サーバーです。
効果的な CPU 負荷管理により、1 台のサーバーで最大10,000 の接続を並列処理でき、FastCGI、SCGI、認証、出力圧縮、URL 書き換えなどの高度な機能セットが付属しています。
Lighttpd は、高速 IO インフラストラクチャにより、同じハードウェアで他の代替 Web サーバーよりも数倍優れたパフォーマンスを拡張できるため、あらゆる Linux サーバーにとって優れたソリューションです。
このチュートリアルでは、PHP、PHP-FPM、MariaDB を使用して Lighttpd を < にインストールする方法を説明します。ホスト名 linux-console.net および IP アドレス 192.168.0.103 のstrong>CentOS/RHEL 8/7 ディストリビューション。
ステップ 1: Lighttpd Web サーバーをインストールする
1. Lighttpd をインストールするには、まず次の yum コマンドを使用してシステム ソフトウェア パッケージと利用可能なリポジトリを更新する必要があります。
yum -y update
2. 次に、システム上で EPEL リポジトリを有効にし、次のコマンドを使用してソフトウェア パッケージを更新する必要があります。
yum -y install epel-release
yum -y update
3. EPEL リポジトリを有効にしたら、次のコマンドを実行して Lighttpd をインストールできるようになります。
yum install lighttpd
4. Lighttpd パッケージをインストールしたら、サービスを開始して起動時に自動的に開始するように有効にし、次のコマンドを使用してステータスを確認します。
systemctl start lighttpd
systemctl enable lighttpd
systemctl status lighttpd
5. 次に、次のコマンドを使用して、システムにインストールされている Lighttpd のバージョンを確認します。
lighttpd -v

lighttpd/1.4.55 (ssl) - a light and fast webserver
6. 次に、ファイアウォールで HTTP トラフィックと HTTPS トラフィックを許可する必要があります。
firewall-cmd --permanent --zone=public --add-service=http
firewall-cmd --permanent --zone=public --add-service=https
firewall-cmd --reload
7. 次に、ブラウザを開いて次の URL をポイントし、Lighttpd Web サーバーが動作していることを確認します。
http://Your-Domain.com
OR
http://Your-IP-addr
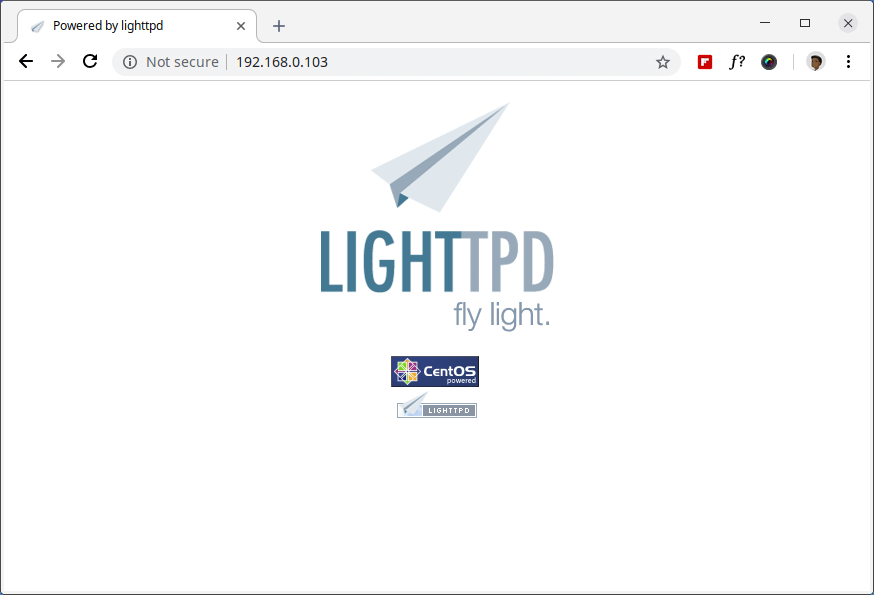
Lighttpd のデフォルトのドキュメント ルート ディレクトリは /var/www/lighttpd/ で、メインの設定ファイルは /etc/lighttpd/lighttpd.conf の下にあります。
ステップ 2: CentOS 7 に MariaDB を MySQL としてインストールする
8. 次に、次のコマンドを使用して、Lighttpd の MySQL サポートをインストールします。
yum -y install mariadb mariadb-server
9. インストールが完了したら、次のコマンドを使用して MariaDB を起動、有効化し、ステータスを確認します。
systemctl start mariadb.service
systemctl enable mariadb.service
systemctl status mariadb.service
10. 最後に、次のコマンドを実行して、MariaDB インストールを保護する必要があります。
mysql_secure_installation
MariaDB のインストールとそれを保護する方法に関して、いくつかの異なる質問が表示されます。データベースの root ユーザー パスワードの変更、テスト データベースの無効化、匿名ユーザーの無効化、および root ログインの無効化をリモートで行うことができます。
サンプル出力
NOTE: RUNNING ALL PARTS OF THIS SCRIPT IS RECOMMENDED FOR ALL MariaDB
      SERVERS IN PRODUCTION USE!  PLEASE READ EACH STEP CAREFULLY!

In order to log into MariaDB to secure it, we'll need the current
password for the root user.  If you've just installed MariaDB, and
you haven't set the root password yet, the password will be blank,
so you should just press enter here.

Enter current password for root (enter for none): Enter OK, successfully used password, moving on... Setting the root password ensures that nobody can log into the MariaDB root user without the proper authorization. Set root password? [Y/n] y New password: Re-enter new password: Password updated successfully! Reloading privilege tables.. ... Success! By default, a MariaDB installation has an anonymous user, allowing anyone to log into MariaDB without having to have a user account created for them. This is intended only for testing, and to make the installation go a bit smoother. You should remove them before moving into a production environment. Remove anonymous users? [Y/n] y ... Success! Normally, root should only be allowed to connect from 'localhost'. This ensures that someone cannot guess at the root password from the network. Disallow root login remotely? [Y/n] y ... Success! By default, MariaDB comes with a database named 'test' that anyone can access. This is also intended only for testing and should be removed before moving into a production environment. Remove test database and access to it? [Y/n] y - Dropping test database... ... Success! - Removing privileges on test database... ... Success! Reloading the privilege tables will ensure that all changes made so far will take effect immediately. Reload privilege tables now? [Y/n] y ... Success! Cleaning up... All done! If you've completed all of the above steps, your MariaDB installation should now be secure. Thanks for using MariaDB!
11. ターミナルで次のコマンドを使用して、MySQL サーバーに接続し、データベース サーバー上の既存のデータベースを確認します。
mysql -u root -pサンプル出力
Enter password:
Welcome to the MariaDB monitor.  Commands end with ; or \g.
Your MariaDB connection id is 10
Server version: 5.5.60-MariaDB MariaDB Server

Copyright (c) 2000, 2018, Oracle, MariaDB Corporation Ab and others.

Type 'help;' or '\h' for help. Type '\c' to clear the current input statement.

MariaDB [(none)]> show databases;
+--------------------+
| Database           |
+--------------------+
| information_schema |
| mysql              |
| performance_schema |
+--------------------+
3 rows in set (0.00 sec)

MariaDB [(none)]>
ステップ 3: CentOS 7 に FastCGI を使用して PHP および PHP-FPM をインストールする
12. FastCGI サポートで PHP-FPM を有効にするには、まず、必要な拡張機能とともに PHP をインストールする必要があります。次のコマンドを使用します。
yum -y install php php-mysqlnd php-pdo php-gd php-mbstring
13. PHP をインストールしたら、Lighttpd の PHP-FPM と FastCGI のサポートを有効にします。 >、これを行うには、これらのパッケージもインストールする必要があります。
yum -y install php-fpm lighttpd-fastcgi
14. 次に、/etc/php-fpm.d/www.conf というファイルを開きます。
vi /etc/php-fpm.d/www.confユーザーとグループをLighttpdに設定します。
; Unix user/group of processes
; Note: The user is mandatory. If the group is not set, the default user's group
;       will be used.
; RPM: apache Choosed to be able to access some dir as httpd
user = lighttpd
; RPM: Keep a group allowed to write in log dir.
group = lighttpdまた、PHP-FPM はデフォルトで /var/run/php/php7.0-fpm.sock ソケットを使用するため、PHP-FPM を作成する必要があります。 Strong> TCP 接続を使用します。 listen 行を次のようにします。
;listen = /var/run/php/php7.0-fpm.sock
listen = 127.0.0.1:9000
15. 次に、PHP-FPM サービスを開始し、次のコマンドを使用して起動時にサービスが自動的に開始されるようにします。
systemctl start php-fpm.service
systemctl enable php-fpm.service
ステップ 4: Lighttpd で FastCGI を使用して PHP および PHP-FPM を有効にする
16. ここでは、3 つのファイル /etc/php.ini、/etc/lighttpd/modules.conf、および を変更する必要があります。 /etc/lighttpd/conf.d/fastcgi.conf を使用して、Lighttpd のPHP サポートを有効にします。
最初のファイル /etc/php.ini を開きます。
vi /etc/php.ini次の行 cgi.fix_pathinfo=1 行のコメントを解除します。
; cgi.fix_pathinfo provides *real* PATH_INFO/PATH_TRANSLATED support for CGI.  PHP's
; previous behaviour was to set PATH_TRANSLATED to SCRIPT_FILENAME, and to not grok
; what PATH_INFO is.  For more information on PATH_INFO, see the cgi specs.  Setting
; this to 1 will cause PHP CGI to fix its paths to conform to the spec.  A setting
; of zero causes PHP to behave as before.  Default is 1.  You should fix your scripts
; to use SCRIPT_FILENAME rather than PATH_TRANSLATED.
; http://php.net/cgi.fix-pathinfo
cgi.fix_pathinfo=1次に、/etc/lighttpd/modules.conf という 2 番目のファイルを開きます。
vi /etc/lighttpd/modules.conf次の「conf.d/fastcgi.conf」 を含めるという行のコメントを外します。
##
## FastCGI (mod_fastcgi)
##
include "conf.d/fastcgi.conf"次に、/etc/lighttpd/conf.d/fastcgi.conf という 3 番目のファイルを開きます。
vi /etc/lighttpd/conf.d/fastcgi.conf次に、次のコンテナをファイルの最後に追加して保存します。
fastcgi.server += ( ".php" =>
        ((
                "host" => "127.0.0.1",
                "port" => "9000",
                "broken-scriptfilename" => "enable"
        ))
)
Lighttpd サービスを再起動して変更を反映し、PHP サポートを有効にします。
systemctl restart lighttpd
ステップ 5: Lighttpd での FastCGI サポートを使用した PHP および PHP-FPM のテスト
17. 上で述べたように、Lighttpd のデフォルトのドキュメント ルートは /var/www/lighttpd/ です。したがって、ここではこのディレクトリにphpinfo.php ファイルを作成します。
vi /var/www/lighttpd/info.phpこれに次の行を追加します。この小さなコードは、PHP のインストールに関する情報とそのバージョンを表示します。
<?php
phpinfo();
?>
18. ブラウザを開いて次のリンクに移動します。
http://Your-Domain.com/info.php
OR
http://Your-IP-addr/info.php
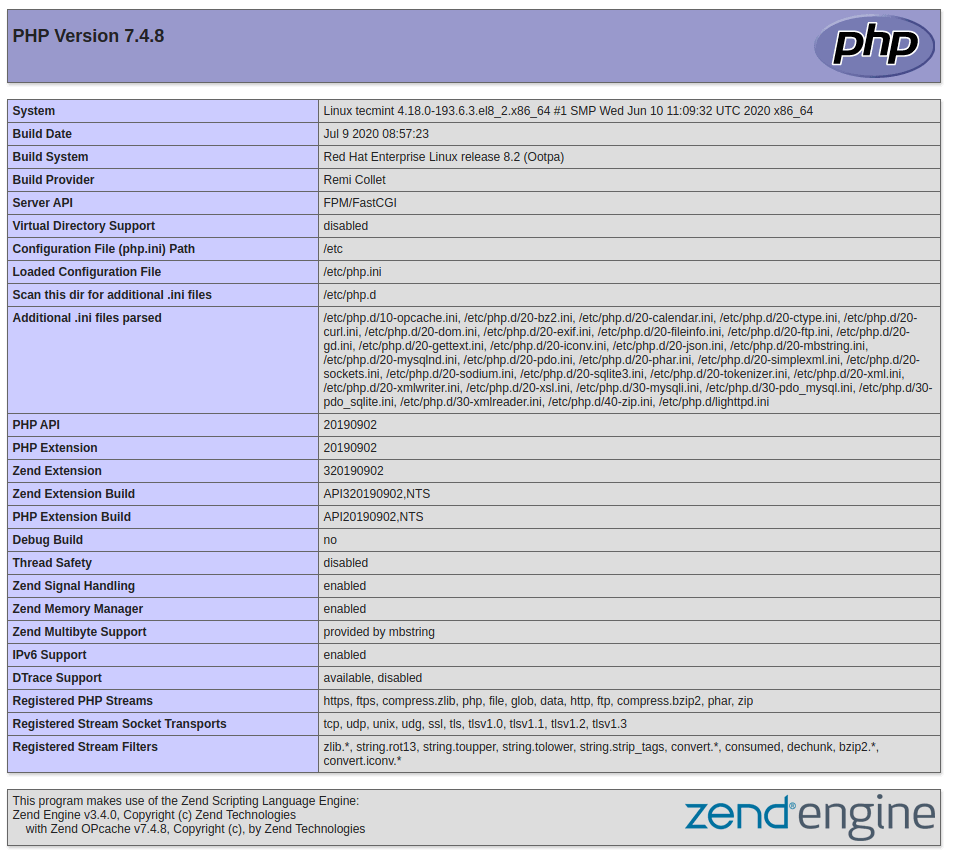
PHP、PHP-FPM、MySQL と、すでに有効になっている他の多くのモジュールの動作情報が表示されます。